List of Topics
- prerequisites
- introduction
- name, logo and colours
- home page
- social interaction
- shopping
- bookings
- available info in the user profile
1. Prerequisites
In order to fully understand this manual, an in-depth knowledge of SPORTRICK is required. It is highly recommended to read each chapter of the manual.
2. Introduction
Through the VAR portal the following aspects can be configured:
- E-Commerce layout and graphics;
- name;
- logo;
- features available to clients
To get credentials for the VAR portal, please contact support@sportrick.com
Any changes performed in the VAR portal won't be included in SPORTRICK's standard customer support.
3. Name, logo and colours
In the VAR portal, click on Managed Environments -> View More -> Configurations -> E-Commerce -> Style:
- base theme: select the desired combination of colours and click on Save

default |  |
blue |  |
dark blue |  |
grey |  |
light | 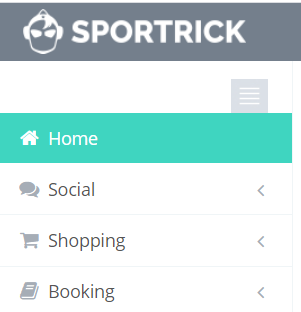 |
light2 |  |
- topbar logo URL and login form logo URL: type in the http to upload your logo (click on Override first), then click on Save
| TOP BAR |   |
| LOGIN PAGE |   |
- login background images: type in the URL of the background image of the login page. It is also possible to insert various URLs to have a continuous swap of images on the background.

4. Home Page
In the E-Commerce section -> HOME PAGE it is possible to configure what the clients will find in the Home Page of the E-Commerce:
- big buttons enabled: big buttons are a shortcut to the main features of the E-Commerce. If big buttons are disabled, clients will only find a menu on the left side of the screen with the shortcuts to access the various sections of the E-Commerce

- enable calendar

- whats new enabled: clients can view their friends' real-time access and the activity they are going to do (booked activity or the type of membership)

social button label: label on the social button. Example: instead of "social" the client could view the lable: "social network"
shopping button label: label on the shopping button. Example: instead of "shopping" the client could view the lable: "memberships"
booking button label: label on the booking button. Example: instead of "booking" the client could view the lable: "book a slot"
social button secondary text: additional text on the social button
shopping button secondary text: additional text on the shopping button
booking button secondary text: additional text on the booking button
social button target: page clients will be redirected to once they click on the social button
shopping button target: page clients will be redirected to once they click on the shopping button
booking button target: page clients will be redirected to once they click on the booking button
5. Social Interaction
From E-Commerce -> SOCIAL it is possible to activate/deactivate the following options:
- enable social: enable social-interaction features in the E-Commerce;
- enable index: enable index on the left-hand side of the screen (it can be used as an alternative to the home-page social button)

- enable friends: enable friendship requests and suggestions

- enable groups: enable group creation

- enable rating: enable rating of the activities the client has taken part into

- use drop down menu

- main menu target: first entry of the menu for social features
6. Shopping
- enable shopping: enable purchases via E-Commerce
enable index: enable index on the left-hand side of the screen (it can be used as an alternative to the home-page social button)

enable renewals
use drop down menu

main menu target: first entry of the menu for shopping options
days to show endend classes: interval of days during which a past class will still be visible (example: 2 days = a class will remain visible up to two days after it took place).
7. Bookings
From E-Commerce -> BOOKING it is possible to activate/deactivate the following options:
- enable booking: enable bookings via E-Commerce
enable index: enable index on the left-hand side of the screen (it can be used as an alternative to the home-page social button)

enable standard booking: clients must purchase a multipack in order to book activities
enable free booking: enable free booking (clients can book classes and services without a multipack);
enable user to invite others to booked service: if this option has been activated in the planning of a service, customers will be able to send an invitation to other participants so that they can book and take part in the service as well;
- check sold object during free booking: necessary option for free booking (booking without multipack)
- use drop down menu

- main menu target: first entry of the menu for booking options
- future lessons of the same activity that a customer can book: number of catch-up classes that clients can book
- manage catch-up: allow users to book catch-up classes via E-Commerce (if catch-up classes have been planned and enabled for courses)
- manage absences: allow user to notify their absence in case they cannot attend a class of a course they enrolled onto (usually necessary to allow the catch-up of missed classes).
8. Available info in the user profile
From E-Commerce -> PROFILE it is possible to activate/deactivate the following options:
- enable profile
- enable purchase history: mandatory to allow renewals

- show overview

- show profile info

- show account

- show accounting (it is possible to make visible only certain types of documents. To do so, ask a SPORTRICK for the IDs of the required documents and the insert the ID in the corresponding box of the option number 10070 of the VAR settings)

- show appointments

- show privacy

- show accesses: latest access records

- show documentation
